

Written by:
Jesse Watson
Likes: 1
2023-01-08
JavaFX | How I Made My First Java GUI
When you begin to learn programming you don’t really get to deal with a GUI — Graphical User Interface — unless you are making a website. When learning Java you would generally start with a basic console program that you can run in your terminal.
There does come a time in a programming student’s life when he wants to make an “actual app” — at least what non-techie people know as an app… an app with a GUI.
I made my first GUI (apart from using HTML etc.) in my first year of Uni. I had been using Java most of the year and finally got introduced to JavaFX — one of the recent Java GUI frameworks.
JavaFX is a pain in the ass to set up at first. But once you know how, you can start coding in a couple of minutes. So in this post I wanna share the steps I had to go through to create a working JavaFX project. Lessgo…
The Tools You Need
Eclipse (IDE)
Like many things there are many ways to code a JavaFX project. I used Eclipse in uni (I prefer VSCode but haven’t learned to to use JavaFX with it). Start by downloading Eclipse here if you haven’t already.
JavaFX (SDK)
Next, head to this site and download the latest SDK type that runs on your device.
Scene Builder (UI Drag & Drop GUI)
Download the latest version from your machine here and start the installation process. This app will be used as an easier way to make the from end GUI.
Setting up Eclipse
Installing JavaFX in Eclipse
The first step is to install JavaFX into your Eclipse IDE. To do this, go to Help > Eclipse Marketplace… . You should then see this window.
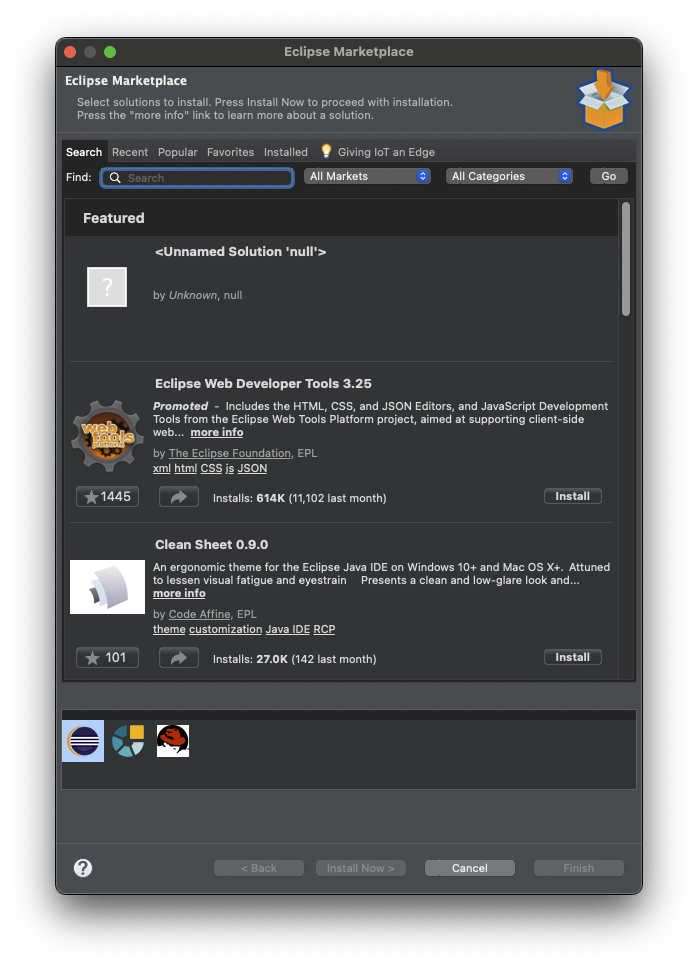
Search for JavaFX in the search bar and click install on the item labeled e(fx)clipse.
After installing JavaFX, you must restart Eclipse. Then you can go onto creating a JavaFX project as you’ll see in the next step.
Creating a project
After restarting the IDE, go to File > New > Other then this window should pop up:
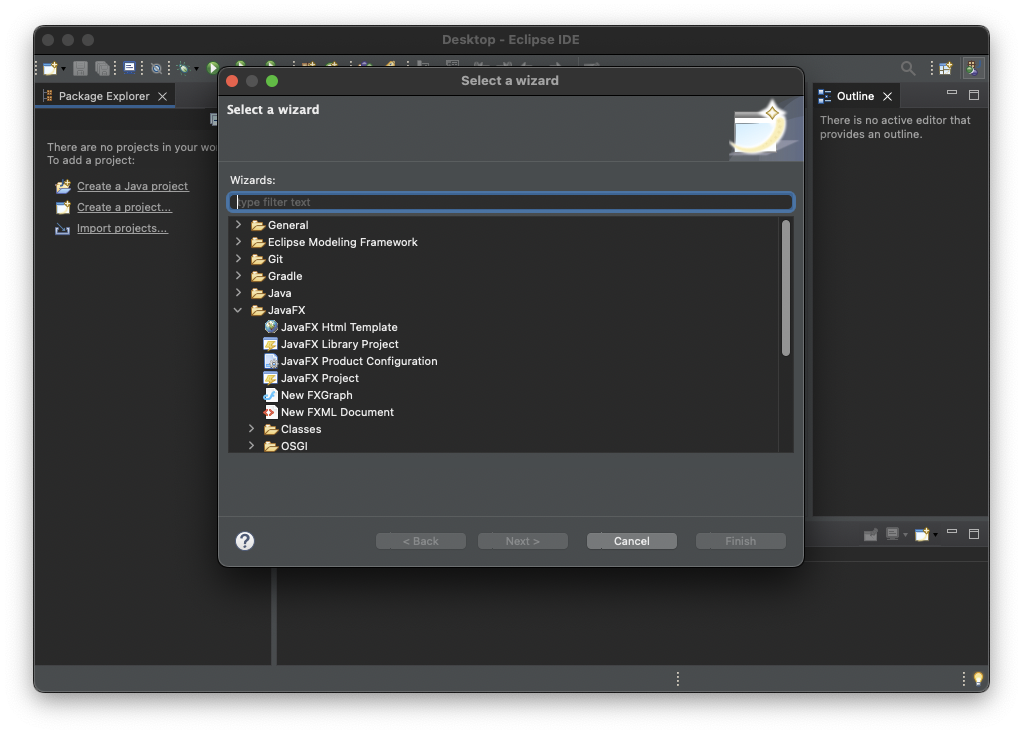
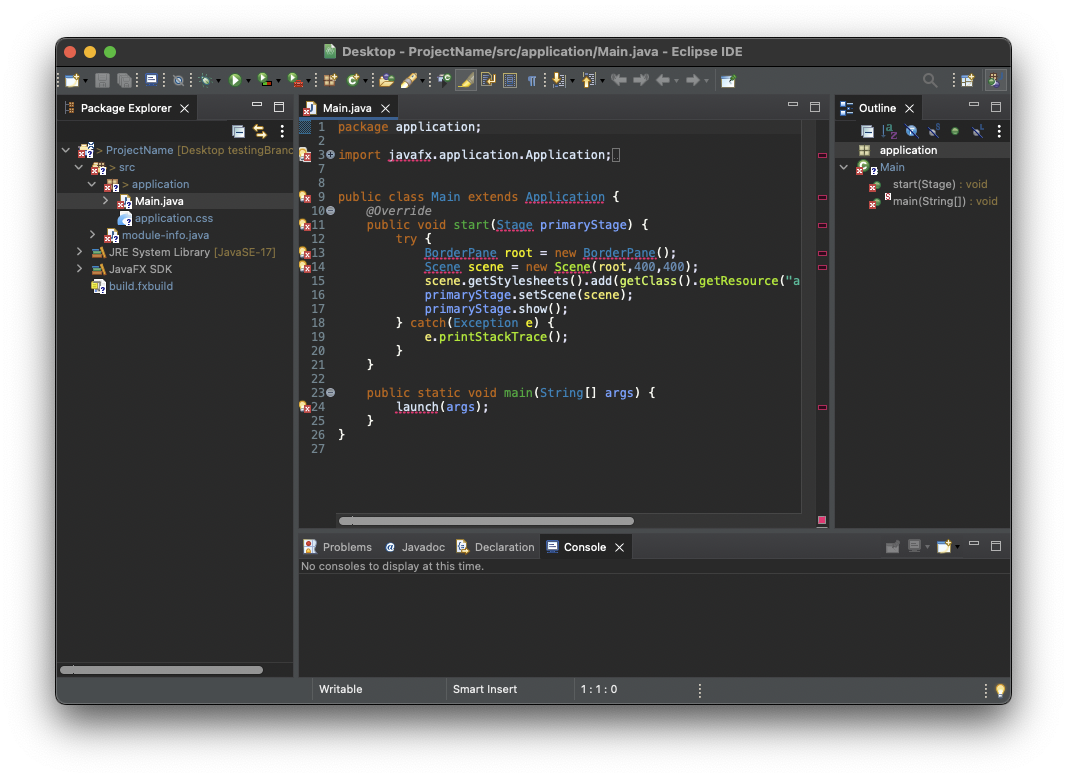
Click on JavaFX Project > Next then give it a name. After that click Next twice and select FXML as the project’s language. Click Finish and your project should look like this:
Linking the SDK Files
Now you want to take those JavaFX SDK files you downloaded and store them in a safe place (I found the Java folder of my computer and stored them in there). We will be navigating to these files in Eclipse so remember where you stored them.
Start by going to Preferences (via Eclipse in the menu bar for Mac — via Window in the menu bar for Windows). In Preferences search for “user” and click on User Libraries.
If you haven’t already, click New and name the user library “JavaFX”. Select JavaFX and click on Add External JARs… .
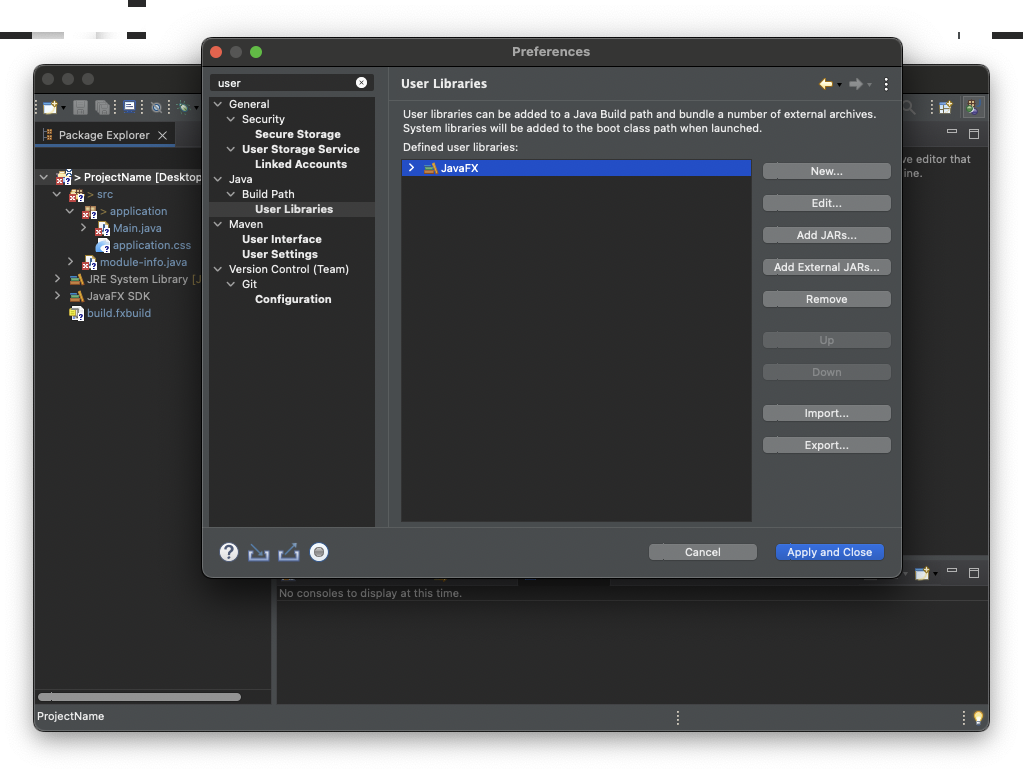
Navigate to the lib folder of your JavaFX SDK download and select all *.jar files. You can then click Open and Apply and Close.
Your environment is now set up, but not your project. That is way there are still red underlines in the code.
Set up Java Build Path
To set up the project right click on the project in the left panel and click on properties. Navigate to Java Build Path and you should see this screen.
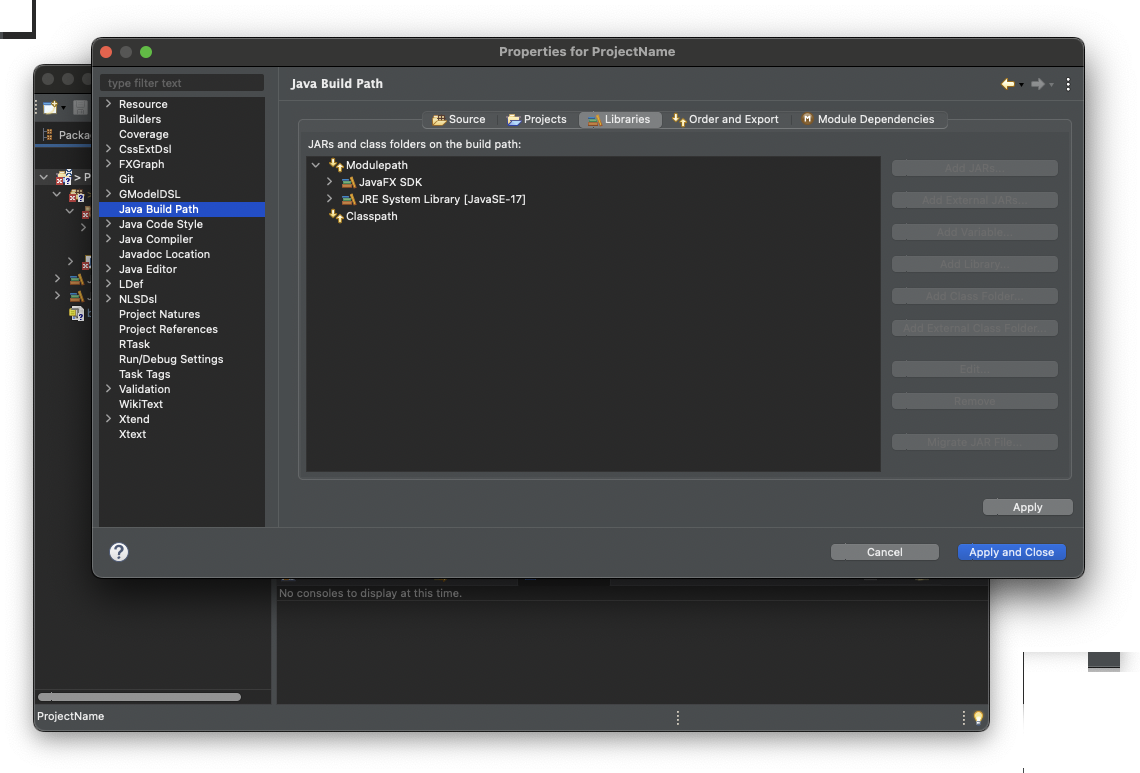
Select Modulepath then click Add Library… > User Library > Next; select JavaFX and hit Finish and Apply and Close. All red underlines in the code should now be gone.
Running Your Project
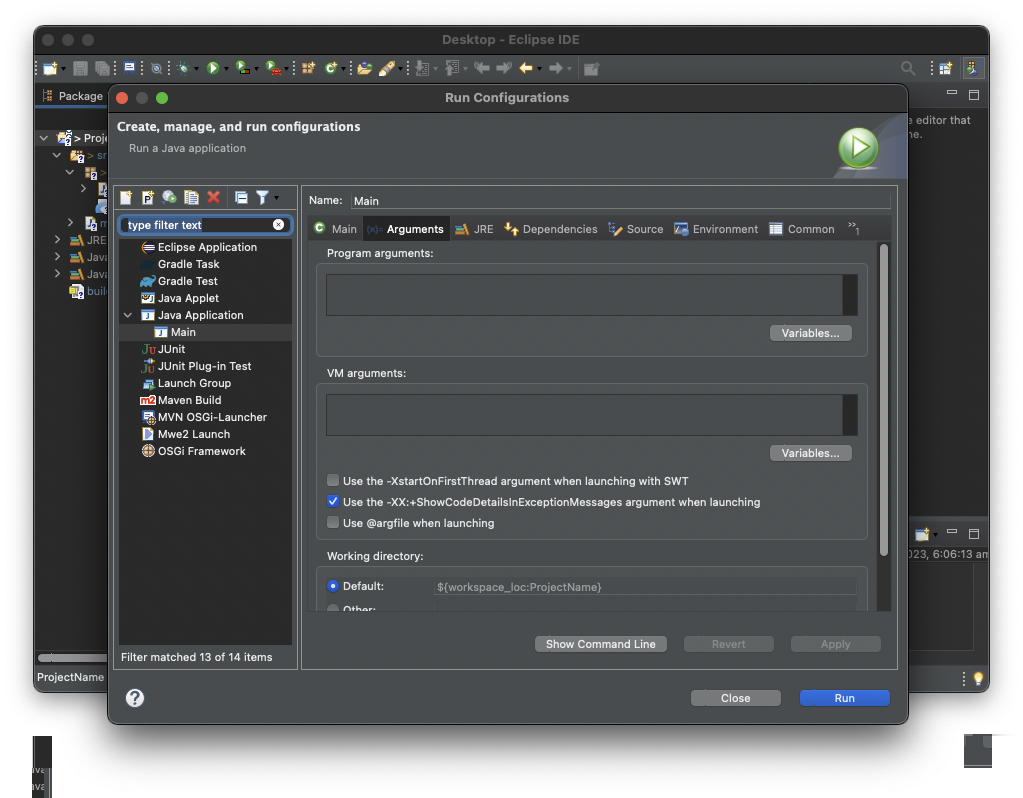
Now that your project is almost ready to go, try running it by clicking the green circle in the top left. If there is a pop up, select Main.application and Run. If no window pops up that is alright, but don’t start coding yet!
Click to drop down beside the green run icon, then click Run Configurations. Select Arguments and uncheck *Use the -XstartOnFirstThread argument when launching with SWT*. Click Run and your blank GUI should pop up.
Create the GUI
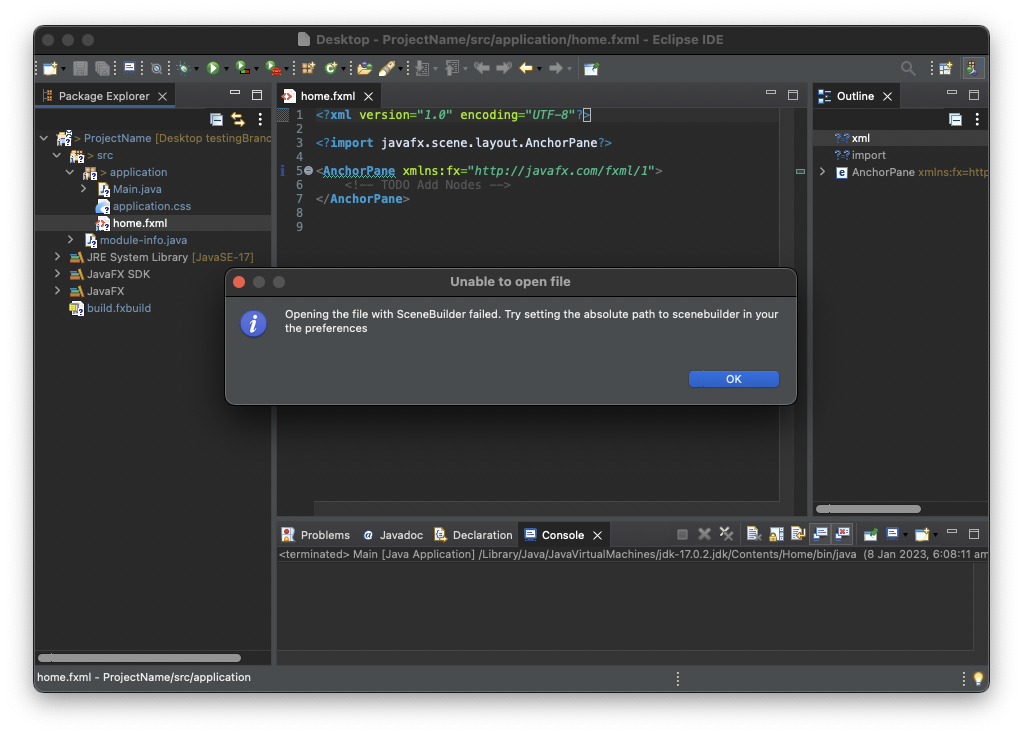
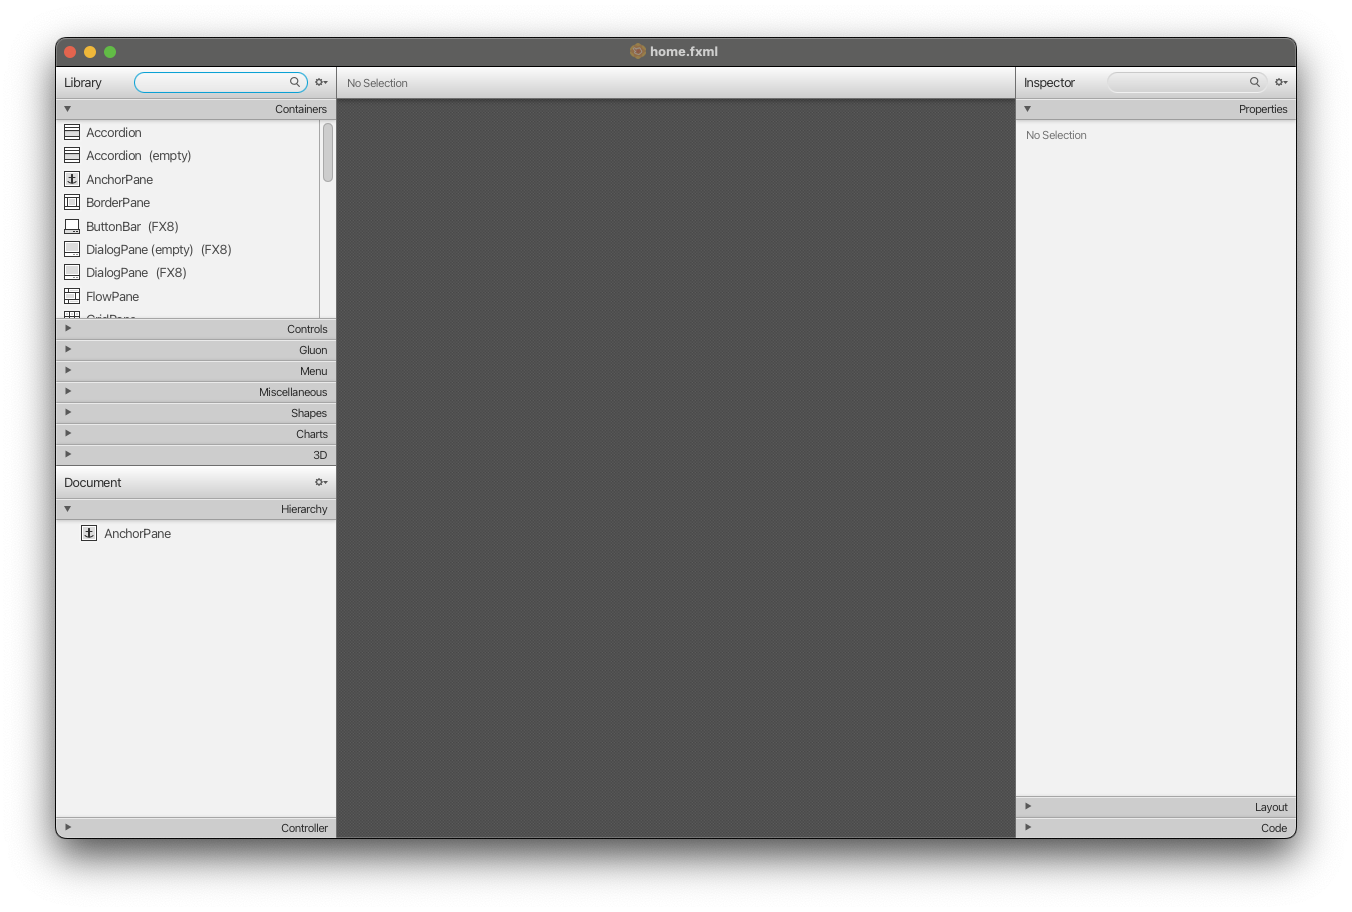
To create a GUI you must use an FXML file. So if there isn’t already one in the Pachage Explorer, right click the application package, hover New and select Other. Select New FXML Document under the JavaFX folder and click Next. Name it and click Finish. Now you can right click the *.fxml file and click Open with SceneBuilder. If you see the following error, continue to the next step.
Setting up SceneBuilder
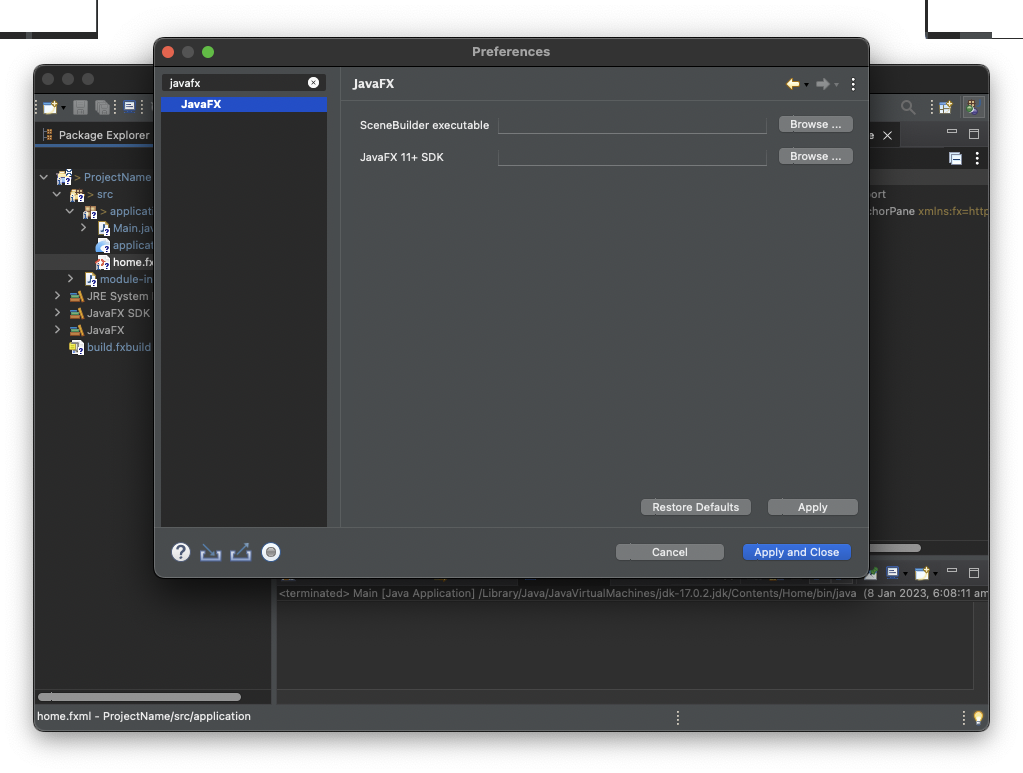
To set up SceneBuilder for a JavaFX project you must go to Preferences, search for “javafx” and click Browse… beside SceneBuilder executable. Select the SceneBuilder application and you are good to go.
Summary
It is fair to say that there are a lot of steps to start a JavaFX project. But once it’s done, you don’t have to do it again for the project. I’m also sure there are easier ways to do this, especially using IDEs like VSCode or IntelliJ.
I hope you all got value out of this article and feel free to reach out via the links below.